Burp Suite
Burp Suite
Burp Suite1 is a GUI-based collection of tools geared towards web application security testing, arguably best-known as a powerful proxy tool. While the free Community Edition mainly contains tools used in manual testing, the commercial versions include additional features, including a formidable web application vulnerability scanner. Burp Suite has an extensive feature list and is worth investigation, but we will only explore a few basic functions in this section. Please note that while Burp Suite Professional is prohibited during the OSCP exam, it is also not necessary.
Let's start Burp Suite. We can find it in Kali under Applications
03 Web Application Analysis > burpsuite.
 Figure 8: Starting Burp Suite
We can also launch it from the command line with burpsuite:
kali@kali:~$ burpsuiteListing 3 - Starting Burp Suite from a terminal shell
Once it launches, we'll choose Temporary project and click Next.
 Figure 9: Burp Startup
We'll leave Use Burp defaults selected and click Start Burp.
 Figure 10: Burp Configuration
After a few moments, the UI will load.
 Figure 11: Burp Suite User Interface
Let's start with the Proxy tool. With this tool, we can intercept any request sent from the browser before it is passed on to the server. We can change almost anything about the request at this point, such as parameter names, form values, or adding new headers. This lets us test how an application handles unexpected arbitrary input. For example, an input field might have a size limit of 20 characters, but we could use Burp Suite to modify a request to submit 30 characters.
In order to set up a proxy, we will first click the Proxy tab to reveal several sub-tabs and disable the Intercept tool, found under the Intercept tab. When Intercept is enabled, we have to manually click on Forward to send each request onward to its destination. Alternatively, we can click Drop to not send the request. There are times when we will want to intercept traffic and modify it, but when we are just browsing a site, having to click Forward on each request becomes very tedious.
The Intercept is on/off toggle button displays the current state of the tool and can be used to enable or disable it as required. Therefore, we will set this to Intercept is off to allow our browser traffic to flow normally:
 Figure 12: Turning Off Intercept
Next, we can review the proxy listener settings. The Options sub-tab shows what ports are listening for proxy requests.
 Figure 13: Proxy Listeners
By default, Burp Suite enables a proxy listener on localhost:8080. This is the host and port that our browser must connect to in order to proxy traffic through Burp Suite. We will leave these default settings.
The Intercept tool is enabled at start up in Burp Suite's default configuration. We can check this setting under User options > Misc > Proxy Interception. However, many users prefer to disable Intercept on startup, which can be done by selecting Always disable. Either way, we can still manually toggle Intercept on and off through Proxy > Intercept > Intercept is on/off.
 Figure 14: Disabling Intercept on Startup
Next, we'll select Proxy and then HTTP history. The contents will be blank until traffic has been sent through Burp Suite:
 Figure 15: Proxy History
According to its author, FoxyProxy Basic2 is a "simple on/off proxy switcher" add-on for Firefox. We will use it to enable or disable the Firefox proxy settings. Let's install that now. We can do it from within Firefox by clicking the Open menu button and selecting "Adds Ons" from the menu:
 Figure 16: Firefox Menu
Once the Add-ons Manager page is open, we will search for "FoxyProxy Basic" by entering it in the search box in the upper right hand corner of the page and pressing enter:
 Figure 17: Firefox Add-ons Manager
At the time of this writing, there are two versions of FoxyProxy available: Basic and Standard. We will use Basic because it is easier to configure and we don't need any of the extra functionality of the Standard version:
 Figure 18: Firefox Add-ons Search Results
We'll click FoxyProxy Basic to view more details about the extension and then click Add to Firefox to install the add-on:
 Figure 19: FoxyProxy Basic
Once we accept the permissions for FoxyProxy Basic, we'll click Add to finish the installation. A welcome page for FoxyProxy will open automatically when the installation is complete. We should also have a new icon to the right of the URL bar:
 Figure 20: FoxyProxy Basic Shortcut
FoxyProxy is disabled by default. We can verify this visually by looking at the icon. If it has a red circle with a slash through it, the add-on is disabled. Before enabling it, we need to add a profile.
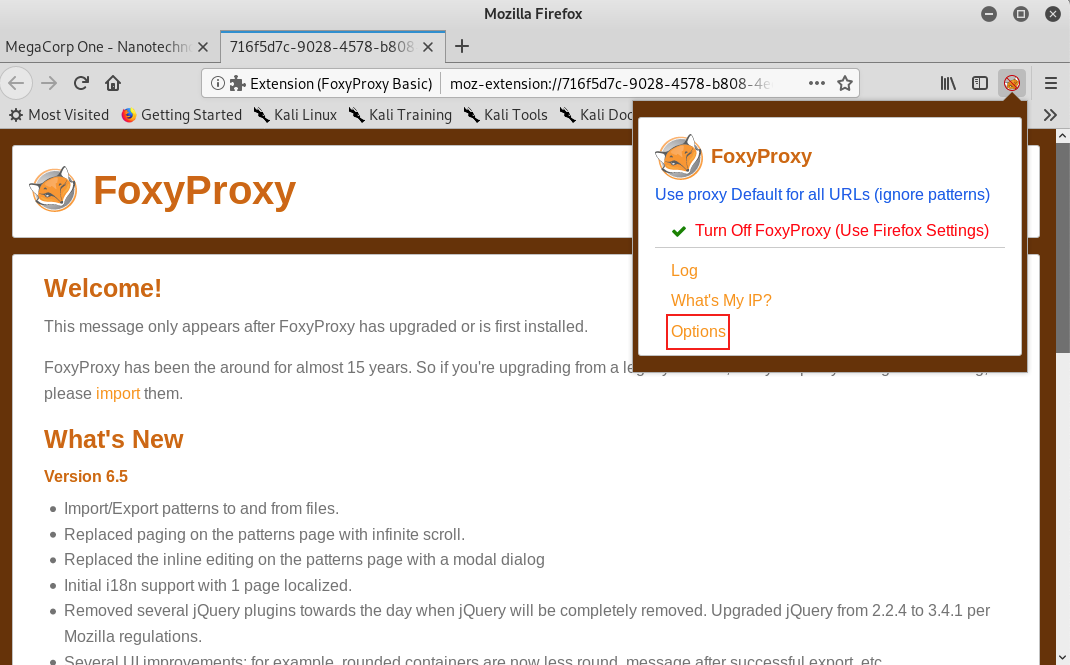
First, we'll click the small fox head icon to open the configuration screen and select Options:
Figure 21: FoxyProxy Basic Shortcut
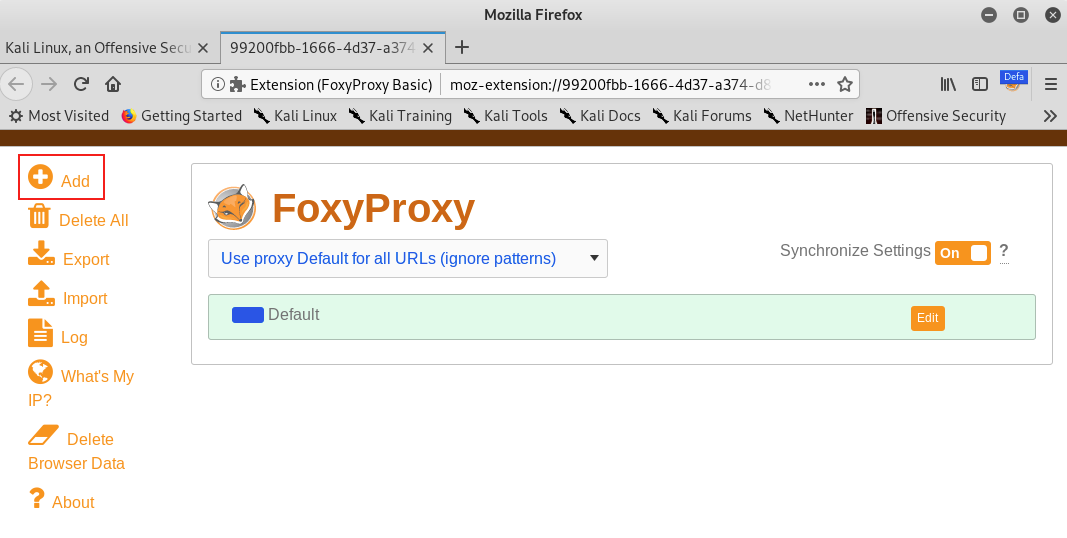
On the Options page, we'll click Add to open the "Add Proxy" screen.
Figure 22: FoxyProxy Basic Options
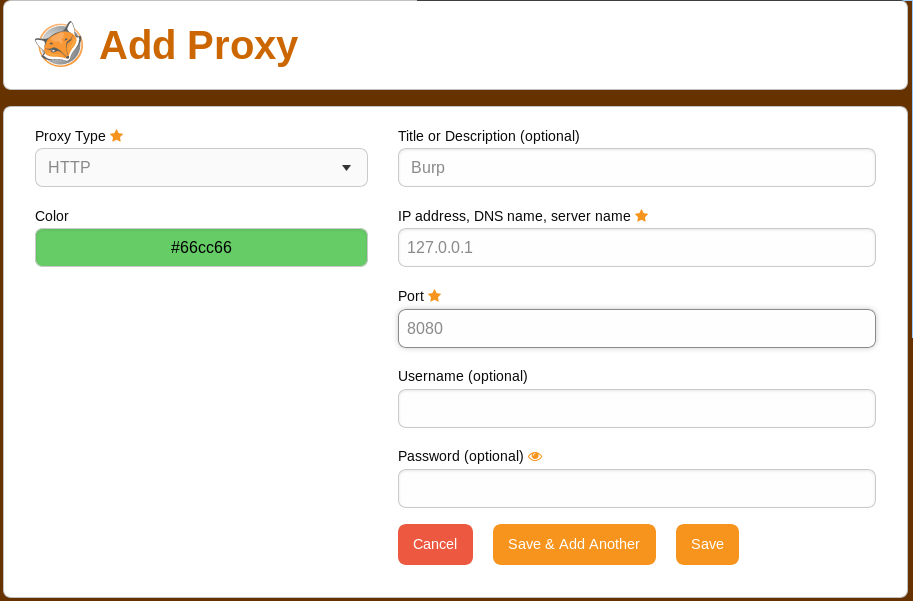
To set up a profile for Burp Suite, we will first set Proxy Type to "HTTP", enter "Burp" for the Title, and "127.0.0.1" for IP address. In addition, we will add the Burp Suite proxy listener port number, which we left as the default of 8080. Finally, we'll click Save.
Figure 23: FoxyProxy Basic Settings for Burp Suite
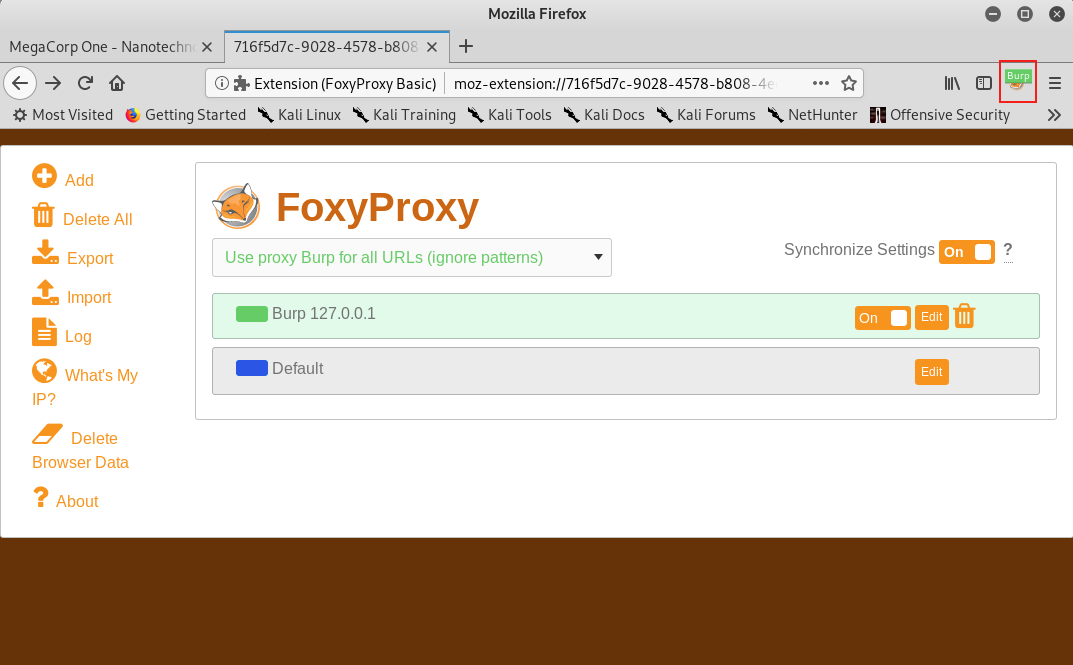
After we save, we will see our new proxy listed on the Options page. We can enable it by clicking the FoxyProxy icon again and then clicking Use proxy Burp for all URLs (ignore patterns).
Figure 24: Selecting a FoxyProxy Profile

The FoxyProxy icon should no longer be crossed out and it should display "Burp" over the icon.
Figure 25: Verifying FoxyProxy is Enabled
With the proxy enabled, we can close any extra open tabs and browse to http://www.megacorpone.com. We should see traffic in BurpSuite under Proxy > HTTP History.
Figure 26: Burp Suite HTTP History
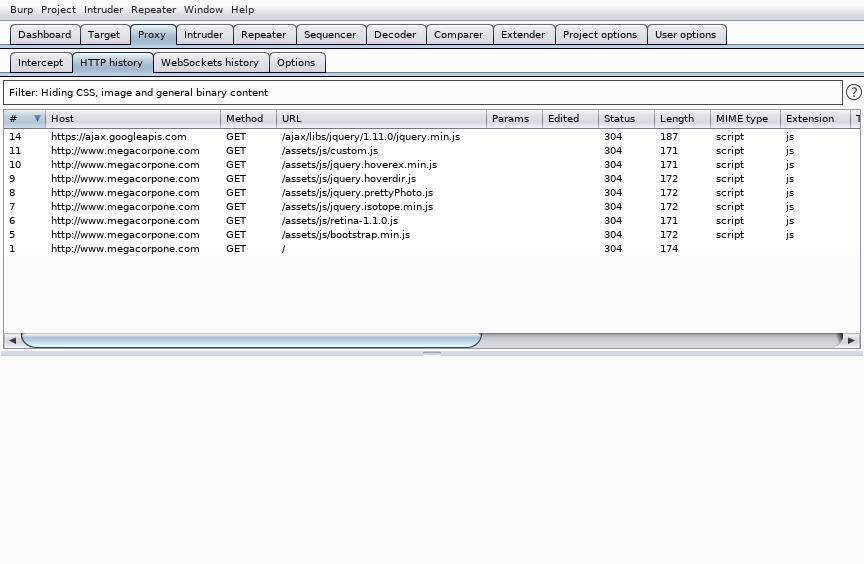
If the browser hangs while loading the page, Intercept may be enabled. Switching it off will allow the traffic to flow uninterrupted. As we browse to additional pages, we should see more requests in the HTTP History tab.
Why does detectportal.firefox.com keep showing up in the proxy history? A captive portal3 is a web page that serves as a sort of gateway page when attempting to browse the Internet. It is often displayed when accepting a user agreement or authenticating through a browser to a Wi-Fi network. To ignore this, simply enter about:config in the address bar. Firefox will present a warning but we can proceed by clicking "I accept the risk!". Finally, search for "network.captive-portal-service.enabled" and double click it to change the value to "false". This will prevent these messages from appearing in the proxy history.
At this point, Firefox is now proxying all of its traffic through Burp Suite. Up to this point, we've only looked at cleartext HTTP traffic. However, if we browse an HTTPS site while proxying traffic through Burp (such as https://www.google.com), we'll be presented with an "invalid certificate" warning:
 Figure 27: Insecure Connection Warning in Firefox
Burp can easily decrypt HTTPS traffic by generating its own SSL/TLS certificate, essentially man-in-the-middling4 ourselves in order to capture the traffic. These warnings can be irritating but we can prevent them by issuing a new certificate and importing it into Firefox.
Even though each Burp Suite CA certificate should be unique, we will ensure this by regenerating it. To do this, we will navigate to Proxy > Options > Proxy Listeners in BurpSuite and click Regenerate CA certificate as shown below:
 Figure 28: Regenerating Burp's CA Certificate
Click Yes on the confirmation dialog and restart Burp Suite.
To import the new CA certificate into Firefox, we will first browse to http://burp to find a link to the certificate:
 Figure 29: Burp Welcome Page
To view the certificate, we click CA Certificate on this screen (or connect to http://burp/cert) and save the cacert.der file to our local machine.
 Figure 30: Downloading the Burp Suite Certificate
Once the download is complete, we can drag and drop the downloaded file into Firefox, select Trust this CA to identify websites and click OK.
 Figure 31: Import the Certificate into Firefox
To verify the import was successful, we can again browse to a site using HTTPS, such as https://www.google.com, which should load without a warning and generate HTTPS traffic within BurpSuite's HTTP History tab.
Finally, with the Repeater tool, we can easily modify requests, resend them, and review the responses. To see this in action, we can right-click a request from Proxy > HTTP History and select Send to Repeater.
 Figure 32: Sending a Request to Repeater
If we click on Repeater, we will have one sub-tab with the request on the left side of the window. We can send multiple requests to Repeater and it will display them on separate tabs. We can send the request to the server by clicking Send.
 Figure 33: Burp Suite Repeater
Burp Suite will display the raw server response on the right side of the window, which includes the response headers and unrendered response content.
 Figure 34: Burp Suite Repeater with Request and Response
Web application exploitation often requires a great deal of trial and error as we submit and modify requests and monitor the responses. Repeater is very useful for this as we can quickly tweak elements of the request and resend them without waiting for our browser to render every response.
1
(PortSwigger, 2019), https://portswigger.net/burp ↩︎
2
(Mozilla, 2019), https://addons.mozilla.org/en-US/firefox/addon/foxyproxy-basic/ ↩︎
3
(Wikipedia, 2019), https://en.wikipedia.org/wiki/Captive_portal ↩︎
4
(Wikipedia, 2019), https://en.wikipedia.org/wiki/Man-in-the-middle_attack ↩︎
Last updated